


Introduction
You can feel the frustration: you are trying to print an important document, the printer is making sounds like it is working, but instead of robust, dark black text, you see faint grey, missing letters, or even a blank sheet. This common printer problem – the nightmare of “why won’t my printer print black?” – can disrupt workflows, cause undue stress, and make you feel powerless. If you are a student racing against a deadline, a professional working on an important presentation, or someone just trying to print a recipe, a printer that refuses to print black ink is a major hassle.
This detailed guide aims to explore the endless possibilities of this annoying problem and assist you with actionable steps to attempt to diagnose and resolve it. We will go from the most basic oversight, such as checking ink levels of your printer, to more complex technical problems that might require running a printer troubleshooter, all so you can be equipped with the skills and knowledge to restore your printer to its expected sharp, professional black print output. Even if you have bought a new printer, these problems can still occur, so we’re constantly ready to address the issue no matter your situation. As a leading manufacturer of high-quality printer consumables, every esteemed industry specialist knows Toner Master’s insights and solutions are backed by decades of expertise in the printing industry. Let’s resolve the issue together and fix this printer problem right now.
Fix It Now: Why Is My Printer Not Printing Black
While this may sound silly, in this case, it is literally true. Printers do not simply manufacture images or texts out of thin air; they use ink or toner and require the black cartridge to have sufficient ink or toner in it. If the black cartridge is either completely empty or almost empty, no black prints will be possible.
Low or Empty Black Ink Cartridge?
This might seem obvious, but it’s the most frequent culprit. Printers rely on ink or toner to create images and text, and if the black cartridge is depleted or running critically low, it simply won’t be able to produce black prints.
For Inkjet Printers (using ink cartridges): In case of inkjet printers, most of them come equipped with accessories like software or a display panel indicating the estimated levels and amount of ink in each cartridge. You should verify if the black ink cartridge is at a level that is low or empty. If it is, you will need to change it for a new one. Even if the level of the cartridge seems to be slightly above empty, it is certainly not high enough for reliable printing, particularly if large volumes of black ink or images are required. Black ink contains a lot of important ingredients required for black and bold, unreadable text.
For Laser Printers (using toner cartridges/drums): Laser printers utilize toner powder. Normally, they do offer an approximate estimation of the toner level, but its indications may be more subtle, like prints getting lighter and streaks appearing on the paper. If your black prints are consistently faint, even after prior successful prints, a low toner level is highly probable. Some laser printers come equipped with separate drum units; black-only issues are less common, but there could be a problem with the black drum as well.
Actionable Steps:
- Check your printer’s display screen or software: Look for any indicators suggesting the presence of ink or toner on the printer’s display screen.
- Physically inspect the cartridge (if possible): Some cartridges do have transparent areas that enable one to visually gauge the level of ink or toner available. This is less common these days.
- Consider the age of the cartridge: A cartridge that hasn’t seen much action is certainly beneficial, but a significant age can cause it to dry out gradually. Additionally, toner may cluster as well.
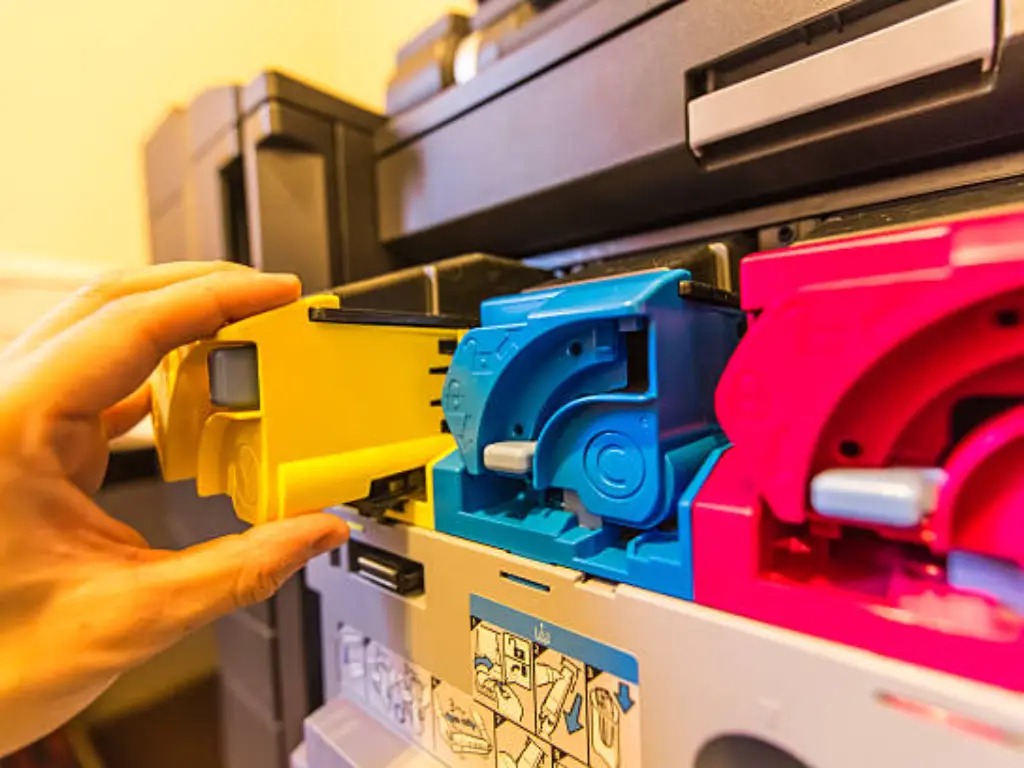
Is the Black Ink Cartridge Properly Installed?
One of the most basic yet often overlooked checks is verifying whether the black printer ink or toner cartridge, especially the old cartridge, has been placed in the correct slot. Failure to secure, seat, or tighten the cartridge will more often than not result in air bubbles forming, preventing the printer refusing access to from accessing the ink or toner and failing to recognize it. Proper alignment of the cartridge relieves any print quality challenges.
Applicable to both Inkjet and Laser Printers
- Turn Off The Printer: It’s best to cut all power to the printer before touching any of the internal components as a safety precaution.
- Open the cover or cartridge access door: If you have not operated the printer before, you can consult the manual for the steps.
- Black Ink or Toner Cartridge: Should normally be found on or around the device.
- Remove the Cartridge: Insert the tab and pull it forward; afterward, lift or slide the cartridge out of the casing gently.
- Reinstall the Cartridge: Place it back into the designated slot. Once replaced, confirm it is pushed down and clicked into position. Usually, you will hear or feel resistance, indicating it is locked into position.
- Closing The Door Or Cover: Subsequent to closing the door, power on the printer and try a test print.
Have You Removed the Protective Tape?
This happens frequently, particularly when a new ink or toner cartridge is installed. To prevent leaking during storage and shipping, a lot of manufacturers place protective tape or seals over the ink/toner outlet ports. In the absence of such tape being removed, it is impossible for the actuator mechanism connected to the print head or drum to receive the requisite ink or toner.
For All Printers Including Inkjet and Laser Printers:
- Identify the black ink/toner cartridge that has to be installed next
- Inspect the cartridge carefully: Pay close attention to the nozzles and rollers. There may be vividly colored plastic tapes or seals inline obstructing the cartridge vent. null
- Remove all tapes and protective seals: Do not leave any behind, especially if the instructions are ambiguous. In case the instructions are confusing, make sure every seal is located and explained in accordance with the cartridge instructions.
- Securely reinstall the cartridge
- Make an attempt to print again: This is often a very insufficient step, yet it is capable of picking up the problem immediately.
Diving Deeper: Addressing Common Black Ink Printing Issues
If the checks you conducted earlier did not solve your problem, the issue might be a little more complicated. Now, let us try to address more common issues that can prevent a printer from printing black. If you have tried all of the basic steps outlined above, these advanced troubleshooting techniques could potentially resolve the issues with your print head.
The Printhead: Could It Be Clogged?
This is an ongoing problem that many users face with regard to printing black ink on paper, especially users with inkjet printers. Regarding printhead problems. The printhead has multiple tiny nozzles that are responsible for spraying the ink. If the printer is not frequently used or lower-quality ink is used, the nozzles can get blocked. However, in most situations, a printer head cleaning cycle is sufficient to sort these problems out.
- Automatic Cleaning via Printer Software: Most inkjet printers come with a printhead cleaning feature that can be accessed directly from the printer or via software installed on the user’s computer. This action dislodges clogs using a minimal quantity of ink. Most operators are advised to undertake this cleaning action 1-3 times. In case blockage is not resolved, many printers also have a lower cleansing option that utilizes more ink but has a higher potential of unclogging more difficult blockages.
Actionable Steps:
* Via Printer Control Panel: Move around the printer’s menu (most likely in “Maintenance,” “Tools,” or “Setup”) until you discover an option called “Clean Printhead” or its equivalent. This should take you through the required steps on the screen.
* Via Printer Software (on your computer): Access the printer software associated with your printer (this can be in the system tray or among the applications list). Inquire in the “Maintenance” section or “Services” and pick a “Printhead Cleaning” option.
Table 1: Common Printhead Cleaning Menu Locations (Example)
| Printer Brand | Menu Location (Control Panel) | Menu Location (Software) |
| HP | Setup > Printer Maintenance > Clean Printhead | HP Smart App > Printer Actions > Print Quality Tools > Clean Printhead |
| Canon | Setup > Maintenance > Printhead Alignment > Printhead Cleaning | Canon IJ Printer Assistant Tool > Cleaning |
| Epson | Setup > Maintenance > Head Cleaning | Epson Printer Utility > Head Cleaning |
| Brother | Ink/Toner > Ink Management > Cleaning | Brother iPrint&Scan > Maintenance > Cleaning |
Note: The menu positions may be different for different printer models. Look at the manual for your printer for accurate steps.
- Advanced Manual Cleaning (Caution: Cleaning could result in irreversible damage to the components of the device; There is a need to safeguard oneself). In situations where automatic cleaning has proved ineffective in resolving the problem, one may consider attempting manual cleaning. However, if executed improperly, there is a potential danger of damaging the delicate printhead. This is typically suggested for individuals who are already familiar with DIY maintenance of their printers and their respective manuals.
Actionable Steps (General Guidance – Consult Your Printer’s Manual First):
* Power down your printer, then unplug the unit.
* Upon gaining access to the cartridge area, gently take out the ink cartridges.
* Locate the printhead: it can either be part of the cartridge (common in some other Canon and HP models) or a distinct element located deeper within the printer.
* For Integrated Printheads: You should carefully clean the nozzles on the bottom of the cartridges with the help of a lint-free cloth and distilled water whilst avoiding the electrical contacts. After the cleaning process, it is important to allow the cartridge to completely dry before it can be reinstalled.
* For Separate Printheads: This cleaning procedure involves the disassembly of the entire printer. This differs widely between printer models but usually requires the gentle lifting off of the printhead assembly and soaking the nozzles in a shallow dish filled with distilled water or other proprietary printing head cleaning solutions. Specific detailed instructions and warnings can be obtained from the service manual particular to your printer.
* Confirm that all parts are completely dried before putting your printer back together and turning it on.
In some cases, the print head issues might be related to a fault in the printer’s firmware, which would make it necessary to update the firmware, so you should check the manufacturer’s site for relevant updates.
Very Important for Laser Printers: Clogged printheads aren’t a problem for laser printers because they use toner powder and a different type of printing process that has a drum unit and a fuser. If a laser printer isn’t printing black, the most likely cause of the problem is a nearly empty or defective toner cartridge, a dusty drum unit, or faulty internal parts like the laser scanner.

Printer Settings Check: Are You Accidentally Printing in Grayscale?
Many issues can stem from hardware, however, some can be caused by software settings. Perhaps you have checked a box on a setting that uses grey scale or black ink only and does not engage the black ink cartridge. Or, a setting places a preference on color as opposed to black for some document types
Actionable Steps (General Guidance – Settings May Vary by Operating System and Printer Driver):
- When Printing from an Application (e.g., Word, PDF Reader):
- Go to File > Print (or use the printing command for that application).
- Look for a Properties, Preferences, or Advanced button related to your printer.
- In the Print setting box, check the tab called Color, Paper/Quality or something akin to that.
- Look at the Color Options or Print Mode and make sure it’s not set to Grayscale, Black and White, Monochrome, but Color or Automatic.
- Look for specific options concerning the use of black pigment ink. Some drivers might have settings like “Use Black Ink Only” and that might be the issue if not intended.
- Apply the changes and try printing once again.
- Check Default Printer Settings (Windows):
- Go to Control Panel > Devices and Printers (or search for “Printers & scanners” in the Windows search bar).
- Right-click on your printer and navigate to Printing preferences.
- Review all color and quality settings to ensure they are appropriately set for black print.
- Check Default Printer Settings (mac OS):
- Navigate to System Preferences > Printers & Scanners.
- Select your printer and click on Options & Supplies, then Options or Driver.
- Look for any settings related to color or grayscale printing and adjust them as needed.
Advanced Troubleshooting: When the Basics Don’t Work
After attempting all the basic solutions, if the problem persists, it is likely due to underlying complex software or hardware problems. Here is some further guidance alongside more complex solutions to the problem.
Software and Driver Issues: The Digital Side of Printing
Communication between the computer and printer is done through software known as drivers. Problems such as failure to print black ink can stem from corrupted or outdated drivers.
Actionable Steps:
Visit the manufacturer’s website, like HP, Canon, Epson, or Brother.
- Locate the Support or Downloads tab.
- Identify your printer’s specific model.
- Choose the most recent version of the driver suitable for your Operating System.
- Make sure to follow the provided instructions. As with most things, it is ideal to uninstall the previous version before installing the new version. This will avoid complications arising from drivers that were not uninstalled fully.
Reinstall Your Printer Driver: If all efforts fail, it might just require totally erasing the most current version of the driver. Then reinstall it with the latest version you have from the manufacturer’s site and recover any missing files needed. Corrupted files are often the reason other files break.
Try Printing from Another Application: This helps determine whether the problem is isolated to specific software or is a broader issue with the printer. If one application prints black fine but another does not, the issue is likely with the settings or configuration of that given application.
Time for a Printer Reset? A Potential Last Resort
Resetting the printer to factory default settings may be the final step to diagnosing more serious hardware issues. If none of the above steps work, this sometimes helps some software issues that are blocking black ink from printing due to other settings being enabled and resolved. If all else fails, consider further options.
Key Notes:
Loss of Information: After a reset, all custom configurations such as the network settings, default paper size, and preferred language on the printer will be lost as the factory reset erases them. These settings will have to be reconfigured post the reset.
Different Steps: Across printer models and brands, resetting the printer varies most of the time. Follow your user manual specific to your device for the set procedures offered.
General Steps (Illustrative – Refer to Your Manual):
- Examine the Printer Control Panel First: The majority of printers have a menu option that allows for a reset somewhere within their interface, typically within “Setup,” “Maintenance,” or “Service.”
- Seek a Reset Option Which Is Separate from Others: Sometimes older or basic printers come with a small, covered reset button. This is a pinhole-type button which can only be pressed by a pin or paper clip and is pressed with the device on or during the switch-on sequence.
- Button Combination: There are some models that have been designed to be started by first pressing specific buttons that need to be held down as the device is booted up.
Most likely, you will need to connect the device to the Wi-Fi network again, as well as change some settings. Print a test page in black and see if the concern has been addressed.
Toner Master Insights: Ensuring Consistent Black Prints
Here at Toner Master, we appreciate the issues that arise due to erratic printing, particularly regarding the ever-important black ink. As a producer of compatible toner cartridges and various other printer and copier parts, we specialize in the provision of quality consumables tailored to perform as intended, delivering dependable results that can be easily found on the internet time and time again.
For many successful brands, including Brother, Canon, EPSON, and HP, Toner Master has been the manufacturer of choice, leveraging dedicated automatic production lines and strong production capabilities. We make and equip our production lines with high-quality materials so that we can meet the demands of our customers consistently and reliably achieve vivid black prints.
One of the key advantages of choosing Toner Master products is our commitment to meeting stretch goals and steady operation. Our ink refills and toner powders are designed to resist rust, fading, and clogging, ensuring seamless volume printing without the blockage interruptions that are so commonplace in our industry, as previously mentioned in the printhead cleaning section.
In addition, we know that accurate reproduction of color, especially black, is critical. Measurement of Blackness is an equally essential step in our workflow. Just like charcoal black is considered the industry standard, we follow strict charcoal black measurement protocols using contemporary color science and advanced technology. This guarantees that the Toner Master black ink and toner translate in every print performed, providing the deep, rich blacks expected for professional documents and sharp text.
When it comes to warranty coverage for products, the industry standard with most suppliers is two years. At Toner Master, however, we extend an additional year of warranty coverage on all of our toner cartridges and ink refills, demonstrating that we stand behind the quality of our products. This warranty serves as an assurance of the durability and reliability of our consumables, offering peace of mind with every purchase.
Whenever you need a reliable provider of high-quality black prints, think Toner Master. With us, you are less likely to experience the frustrating challenges we have covered in this guide. From raw material selection to advanced manufacturing, quality testing, and integration with your printer, we focus on providing optimum reliability, letting you concentrate on accomplishing your tasks instead of worrying about printing problems.
Conclusion
Among the many issues people face with printers, one of the most frustrating has to do with the color black, specifically when the printer refuses to print in black. Thankfully, as we’ve seen, there are a plethora of reasons related to the problem of your printer not printing in black, as well as quite a few effective solutions.
While working through the steps listed in this guide, remember to check ink levels, cartridge installation, and more complicated processes like cleaning print head and printer maintenance. You should be able to troubleshoot the problem. Also, remember that in some integrated systems, color cartridges could also impact the printing of black.
Make sure to always refer to your specific printer model’s manual for any special instructions or safety guidelines. If you’re searching for laser and ink cartridges specialized for trouble-free black printing, backed by a 3-year warranty, look no further than Toner Master. Our mission is to provide you with consumables that guarantee black prints