


Is Refilling Toner Cartridges Right for You? Weighing the Pros and Cons
The thought of saving money by refilling your toner cartridge rather than purchasing a new one can certainly be enticing. The satisfaction that comes from doing it yourself, along with the appeal of helping Mother Nature, is certainly welcoming. But even before deciding to embrace toner refills, it is important to have a balanced perspective. The most economically favorable solution is to make toner refills, but the reality is far more complex.
As noted previously, the possibility of spending less initially and producing less waste are compelling reasons to consider refilling. There is also appeal in doing the work, as opposed to simple purchasing. However, toner powder – particularly the toner powder used in refilling – brings with it its own challenges. The World Health Organization has a serious view on health risks posed by particulate matter exposure, and toner powder is no exception. The messiness and quality of printing also bring along significant headaches. The frustrating smearing and streaking caused by DIY refills can damage the printer and even void warranties. The amount of effort and time put in is also painful.
In order to help you evaluate if toner refilling is appropriate for you, think about this overview of advantages and disadvantages:
| Pros | Cons |
| Potential Cost Savings | Health and Safety Risks (Toner inhalation, mess) |
| DIY Satisfaction | Inconsistent Print Quality (Streaking, smudging) |
| Reduced Waste (Environmental) | Potential Printer Damage |
| Time and Effort Investment | |
| Warranty Voiding (Potentially) |
You can see that while there are some advantages to refilling, there are also considerable disadvantages that need to be addressed. In order to determine if toner refilling is the right decision, you need to evaluate these factors thoroughly.
If you consider toner refilling, you need to think through a list of factors: Potential savings vs. health risks, print quality, and time. These are some of the most common deciding factors. The answer may be yes but for most, the answer is no. Informed decisions look at all sides which is why there use to be a guide showing you through a ‘do it yourself’ process.
Essential Tools and Materials for Toner Refilling
Refilling a toner cartridge can be more efficient and safe when you have the correct tools. for HP toner. There is no need to buy all the materials right away; you can start with the essentials. Make sure not to overlook the following items that will help you get the job done:
Toner Refill Kit: Comes with toner powder and a funnel or spout for your printer model; this is a must-have.
Protective Equipment:
- Latex or rubber Gloves: To ward off skin contact with the toner.
- Dust mask (optional): To block airborne toner from entering your lungs.
- Goggles (optional): Eye protection and safety glasses or goggles are a necessity.
- Screwdrivers: A basic Phillips and flathead screwdriver set is perfect for opening the cartridge.
- Toner Vacuum Cleaner: Ideal for toner cleanup. Regular vacuums are inefficient for toner.
- Cloths: Soft cloths or paper towels are perfect for wiping spills.
While drills, cleanup supplies, and extra lights can be beneficial, the above suggestions are the essential items you need if you want to try out toner refilling. To repurpose unused toner cartridges at home, remember to follow proper safety guidelines like wearing safety gear to protect yourself along with a vacuum designed specifically for toners.
Step-by-Step Guide to Finish Cartridge Refilling
With your tools and materials assembled, you’re ready to tackle the toner cartridge refilling process. While specific steps may vary slightly depending on your printer and new replacement cartridge model, the general principles remain consistent. Always consult the instructions provided with your refill kit and any reputable online guides specific to your cartridge for the most accurate and detailed procedure. This guide outlines the common steps involved:
Step 1: Safely Opening Your Toner Cartridge
This is often the most delicate part of the process. Toner cartridges are designed to be sealed units, and opening them requires care to avoid damage.
- Identify the Fill Hole or Plug: Examine your cartridge for an existing fill hole covered by a plug or seal. Some cartridges are designed with refill access in mind. If you find one, this is your entry point.
- Locate Screws (If Necessary): If no fill hole is apparent, look for screws holding the cartridge housing together. These are usually located on the sides or ends of the cartridge. Use the appropriate screwdriver to carefully remove them.
- Drilling a Fill Hole (If Required and as a Last Resort): Only proceed with drilling if your refill kit instructions or a trusted guide specifically instructs you to do so for your cartridge model. Choose a location on the cartridge housing that is away from gears, drums, and electronic components. Use a small drill bit and drill slowly and carefully to create a hole just large enough for your funnel or toner bottle spout. Deburr any sharp edges around the hole after drilling. Again, exercise extreme caution and only drill if absolutely necessary and instructed.
- Separate the Cartridge Halves (If Applicable): Some cartridges are designed to split into two halves. If screws have been removed, gently try to separate the halves, being mindful of any internal components that might be connected. Do not force it. If it doesn’t separate easily, re-examine for hidden screws or consult your specific guide.
Step 2: Removing the Old Toner
Before adding new toner, it’s crucial to remove as much of the old toner and waste toner as possible. This prevents mixing different toner formulations, which can lead to print quality issues.
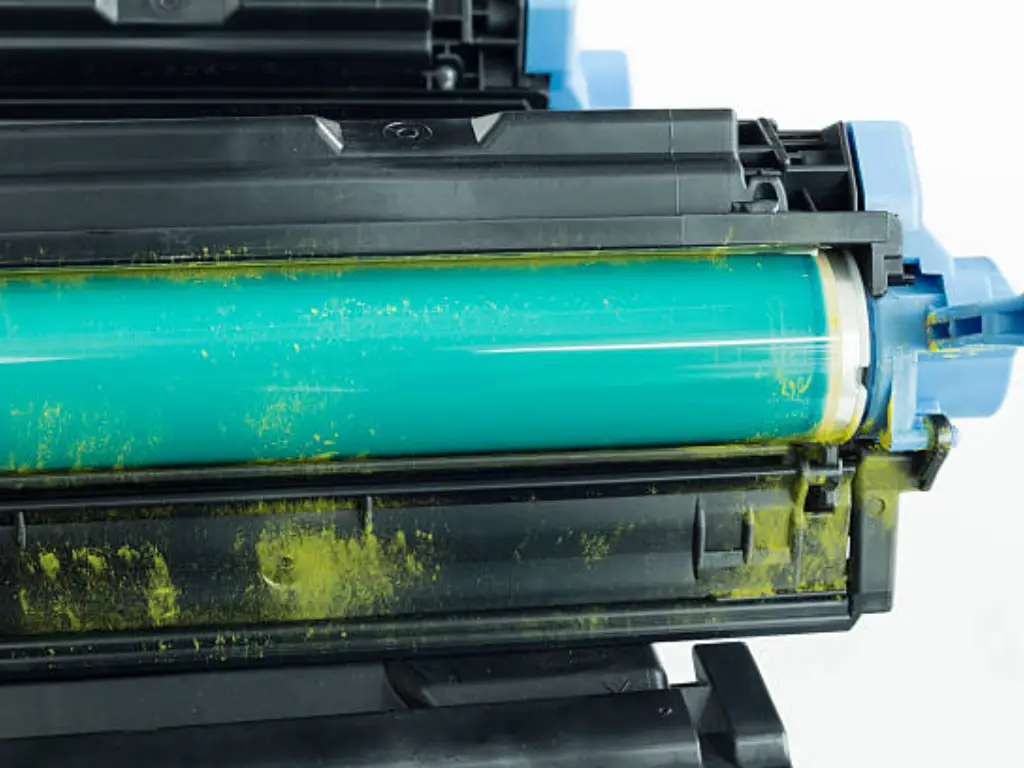
- Locate the Waste Toner Compartment: Most laser cartridges have a separate compartment for waste toner. This compartment is usually located near the drum unit and may be accessible after opening the cartridge.
- Carefully Empty Waste Toner: Holding the cartridge over a waste bin lined with a plastic bag, gently tap and shake the cartridge to empty the waste toner. Use your toner vacuum to carefully suction out any remaining waste toner from the compartment. Do this step slowly and deliberately to avoid creating a toner dust cloud.
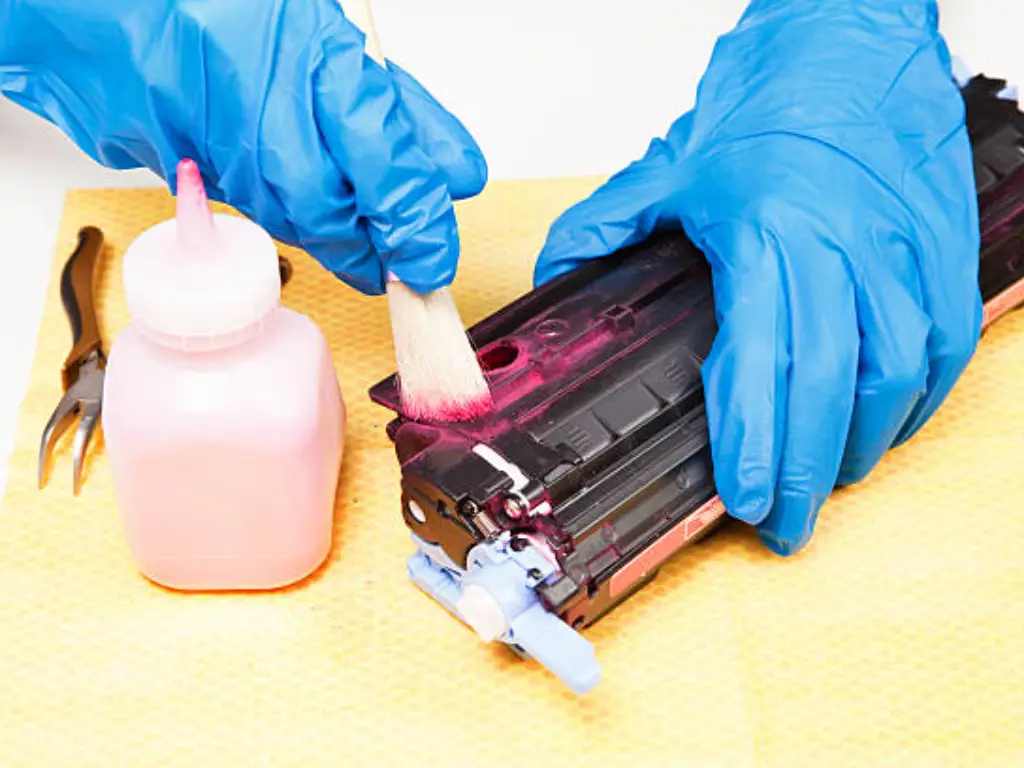
- Clean Excess Toner (Optional but Recommended): Use your toner vacuum to carefully clean any excess toner powder from around the fill hole and cartridge components. A soft brush can be used to loosen caked-on toner before vacuuming. Avoid using compressed air, as this will disperse toner particles into the air.
Step 3: Refilling the Cartridge with a New Toner
Now for the main event: adding the new toner. This step requires precision to avoid spills and ensure the correct amount of toner is added.
- Prepare Your Toner Refill Bottle: Open your toner refill bottle and attach the funnel or spout provided in your kit.
- Slowly Pour in New Toner: Position the funnel or spout over the fill hole you created or located. Slowly and steadily pour the new toner powder into the cartridge. Avoid rushing this step, as a toner can easily overflow or create dust clouds. Pour until the toner reservoir is filled to the recommended level, usually indicated in your refill kit instructions or cartridge guides. Do not overfill.
- Clean Up Spills Immediately: If any toner spills during the refilling process, use a damp cloth or toner vacuum to clean it up immediately.
Step 4: Sealing and Testing Your Refilled Cartridge
With the new toner in place, the final steps involve resealing the cartridge and testing its functionality.
- Replace Plugs or Seals: If your cartridge uses plugs or seals for the fill hole, ensure they are securely reinserted to prevent toner leakage. Some refill kits provide replacement plugs or seals.
- Reassemble Cartridge Housing (If Applicable): If you separate the cartridge halves, carefully reassemble them, aligning all components correctly. Replace and tighten all screws. Ensure the housing is securely closed.
- Clean the Exterior: Use a damp cloth to wipe down the exterior of the refilled cartridge, removing any toner residue.
- Test Print: Install the refilled cartridge in your printer and perform a test print. Check for print quality issues such as streaking, smudging, or faded output. If the rint quality is poor, consult the troubleshooting section below or your refill kit instructions.
Safety and Troubleshooting for Toner Refilling
Toner refilling can save users money but poses certain risks and problems. As always, safety and troubleshooting skills must be prioritized.
Safety First:
- Use a ventilator-equipped room or refill outdoors. If indoors, windows must be opened and a fan should be used to create airflow.
- Best to make use of goggles or some kind of eye protection.
- Use skin guards or gloves so that there is no contact with toner.
- Dispose of all used toner powder and waste-containing toner according to local regulations.
Troubleshooting Common Issues:
- Poor Print Quality (Streaking, Smudging, Faded Prints):
- Insufficient Toner: It is important to keep in mind that when printing, there is a possibility that a small amount of toner has not been footed. The most brilliant solution is to add (but not too much) toner to the cartridge and, try printing again.
- Uneven Toner Distribution: Gently rocking cartridges back and forth aids in the even and smooth disbursement of materials throughout.
- Damaged Drum Unit: It is possible that an old drum unit has been used and needs replacements. Unfortunately, it is necessary to mention that their issues should be prioritized before being filled up.
- Incompatible Toner: Check if the toner bought is accurate with your printer model. Otherwise, look for something else compatible.
- Toner Leakage:
- Improper Sealing: Validate if on going plug settings are well locked properly on every seal and that caps fillers are firmly attached onto the ports.
- Overfilling: Enough can be noted when the cartridges are already filled with toner, hence no additional toner would be required. If needed, make sure to draw out a bit more.
- Damaged Cartridge Housing: Cracks or other forms of damage to the housing will lead to leakage. It is also possible that the cartridge is unrepairable at this stage.
- Printer Not Recognizing Refilled Cartridge:
- Reset Printer Memory: A printer can have a set memory that has to be reset manually after a refill. Check your printer manual on how this is done for your device.
- Chip Issues: Numerous cartridges contain chips that keep track of the toner amount remaining in the cartridge. These chips are not reset during a refill, and the printer continues to show low toner notifications. Replacement or reset tools are often available for some models, but this increases the expense and complication of the device.
- Incompatibility: The refill kit provided is not guaranteed to work with your printer model.
Should you face any persistent issues, or if there is anything that makes you uncomfortable with the refilling process, then the best option would be to ask yourself whether the process of refilling it yourself is a suitable choice.
Brand & Model Specific Toner Refilling Tips: What You Need to Know
As for the steps taken to refill toner cartridges, they generally remain the same. However, some specifics can change depending on the printer, and cartridge brand and model. Treating all cartridges the same could end up causing more harm than good. It is very important to know what specifics your cartridge has in order to refill it successfully.
Brother Printers: Brother cartridges are often considered comparatively easier to refill than cartridges from other brands. The majority of Brother cartridges come with accessible fill plugs and easy to remove tops. However, Brother printers often have toner cartridges with gears and sensors that must be properly aligned during assembly. Some specific Brother models might also have chip-based toner level monitoring which will need the chips to be changed or reset in order to function after being refilled.
HP Printers: When it comes to HP toner cartridges, the process of refilling them can be more complicated. A number of HP cartridges do not have accessible fill holes and may need drilling. HP almost always uses chip technology to monitor toner usage and cuts off the ability to refill the cartridge, which is not uncommon. Chips can be bypassed or reset, but it is notoriously difficult and may need unique gadgets or changes to the computer program, tools that are usually outside the boundaries of a standard do-it-yourself refilling procedure. In addition, some HP cartridges combine the drum unit with the toner cartridge which makes the entire process of refilling more tedious while simultaneously damaging delicate parts.
Samsung Printers: Samsung, just like HP, includes chip technology in their toner cartridges. However, unlike others, Toner Master focuses its production lines to certain printer makers like Samsung. This more specialized focus grants a higher level of accuracy and quality to compatible cartridges, which makes them more dependable than DIY refills. Samsung users in particular stand to benefit from this change.
Canon, Epson, and Other Brands: Other brands also have their distinct ways of designing cartridges and how difficult it is to refill them. For instance, Canon cartridges may include special toner seals or unique sealing mechanisms. Epson, also known for its inkjet printers, produces laser printers. Their toner cartridge design will be different from those of HP and Brother.
Key Takeaways for Brand-Specific Refilling:
- Research is Essential: Always look for refill instructions that feature videos specific to your printer’s brand and model number.
- Check for Fill Plugs: Check to see if your cartridge has a filler plug. This makes things so much easier.
- Chip Considerations: Does your cartridge use a chip that tracks the toner level? If the answer is yes, be ready to do some extra work to restore or replace the chip, or accept that readings of the toner level will not be accurate after a refill.
- Complexity Varies: Some brands or models are simply more a more difficult and risky refill process. If you are an amateur, it is wise to try a brand known for uncomplicated procedures, such as Brother.
- Understanding your printer’s brand and cartridge model pays off by improving accuracy and decreasing issues in toner refilling.
Beyond DIY: Why Toner Master Offers a Smarter Printing Solution
Refilling toner cartridges yourself, described in earlier sections, comes with many challenges. It requires specific tools and time, potential strains on one’s physical well-being, and often unachievable print consistency. Though the initial price of a refill kit may seem economical, the hidden costs of time spent, possible damage to the printer, and immense frustration overshadow the supposed savings.
Toner Master creates printer consumables, serve the needs of modern technology. Unlike others, Toner Master offers self-service solutions, however, we believe businesses need a more dependable solution; a solution that encourages these users to turn to our products instead. We excel in providing smart printing solutions that save money, time, and frustration in the long run.
Making the Switch: Finding the Perfect Toner Master Cartridge for Your Printer
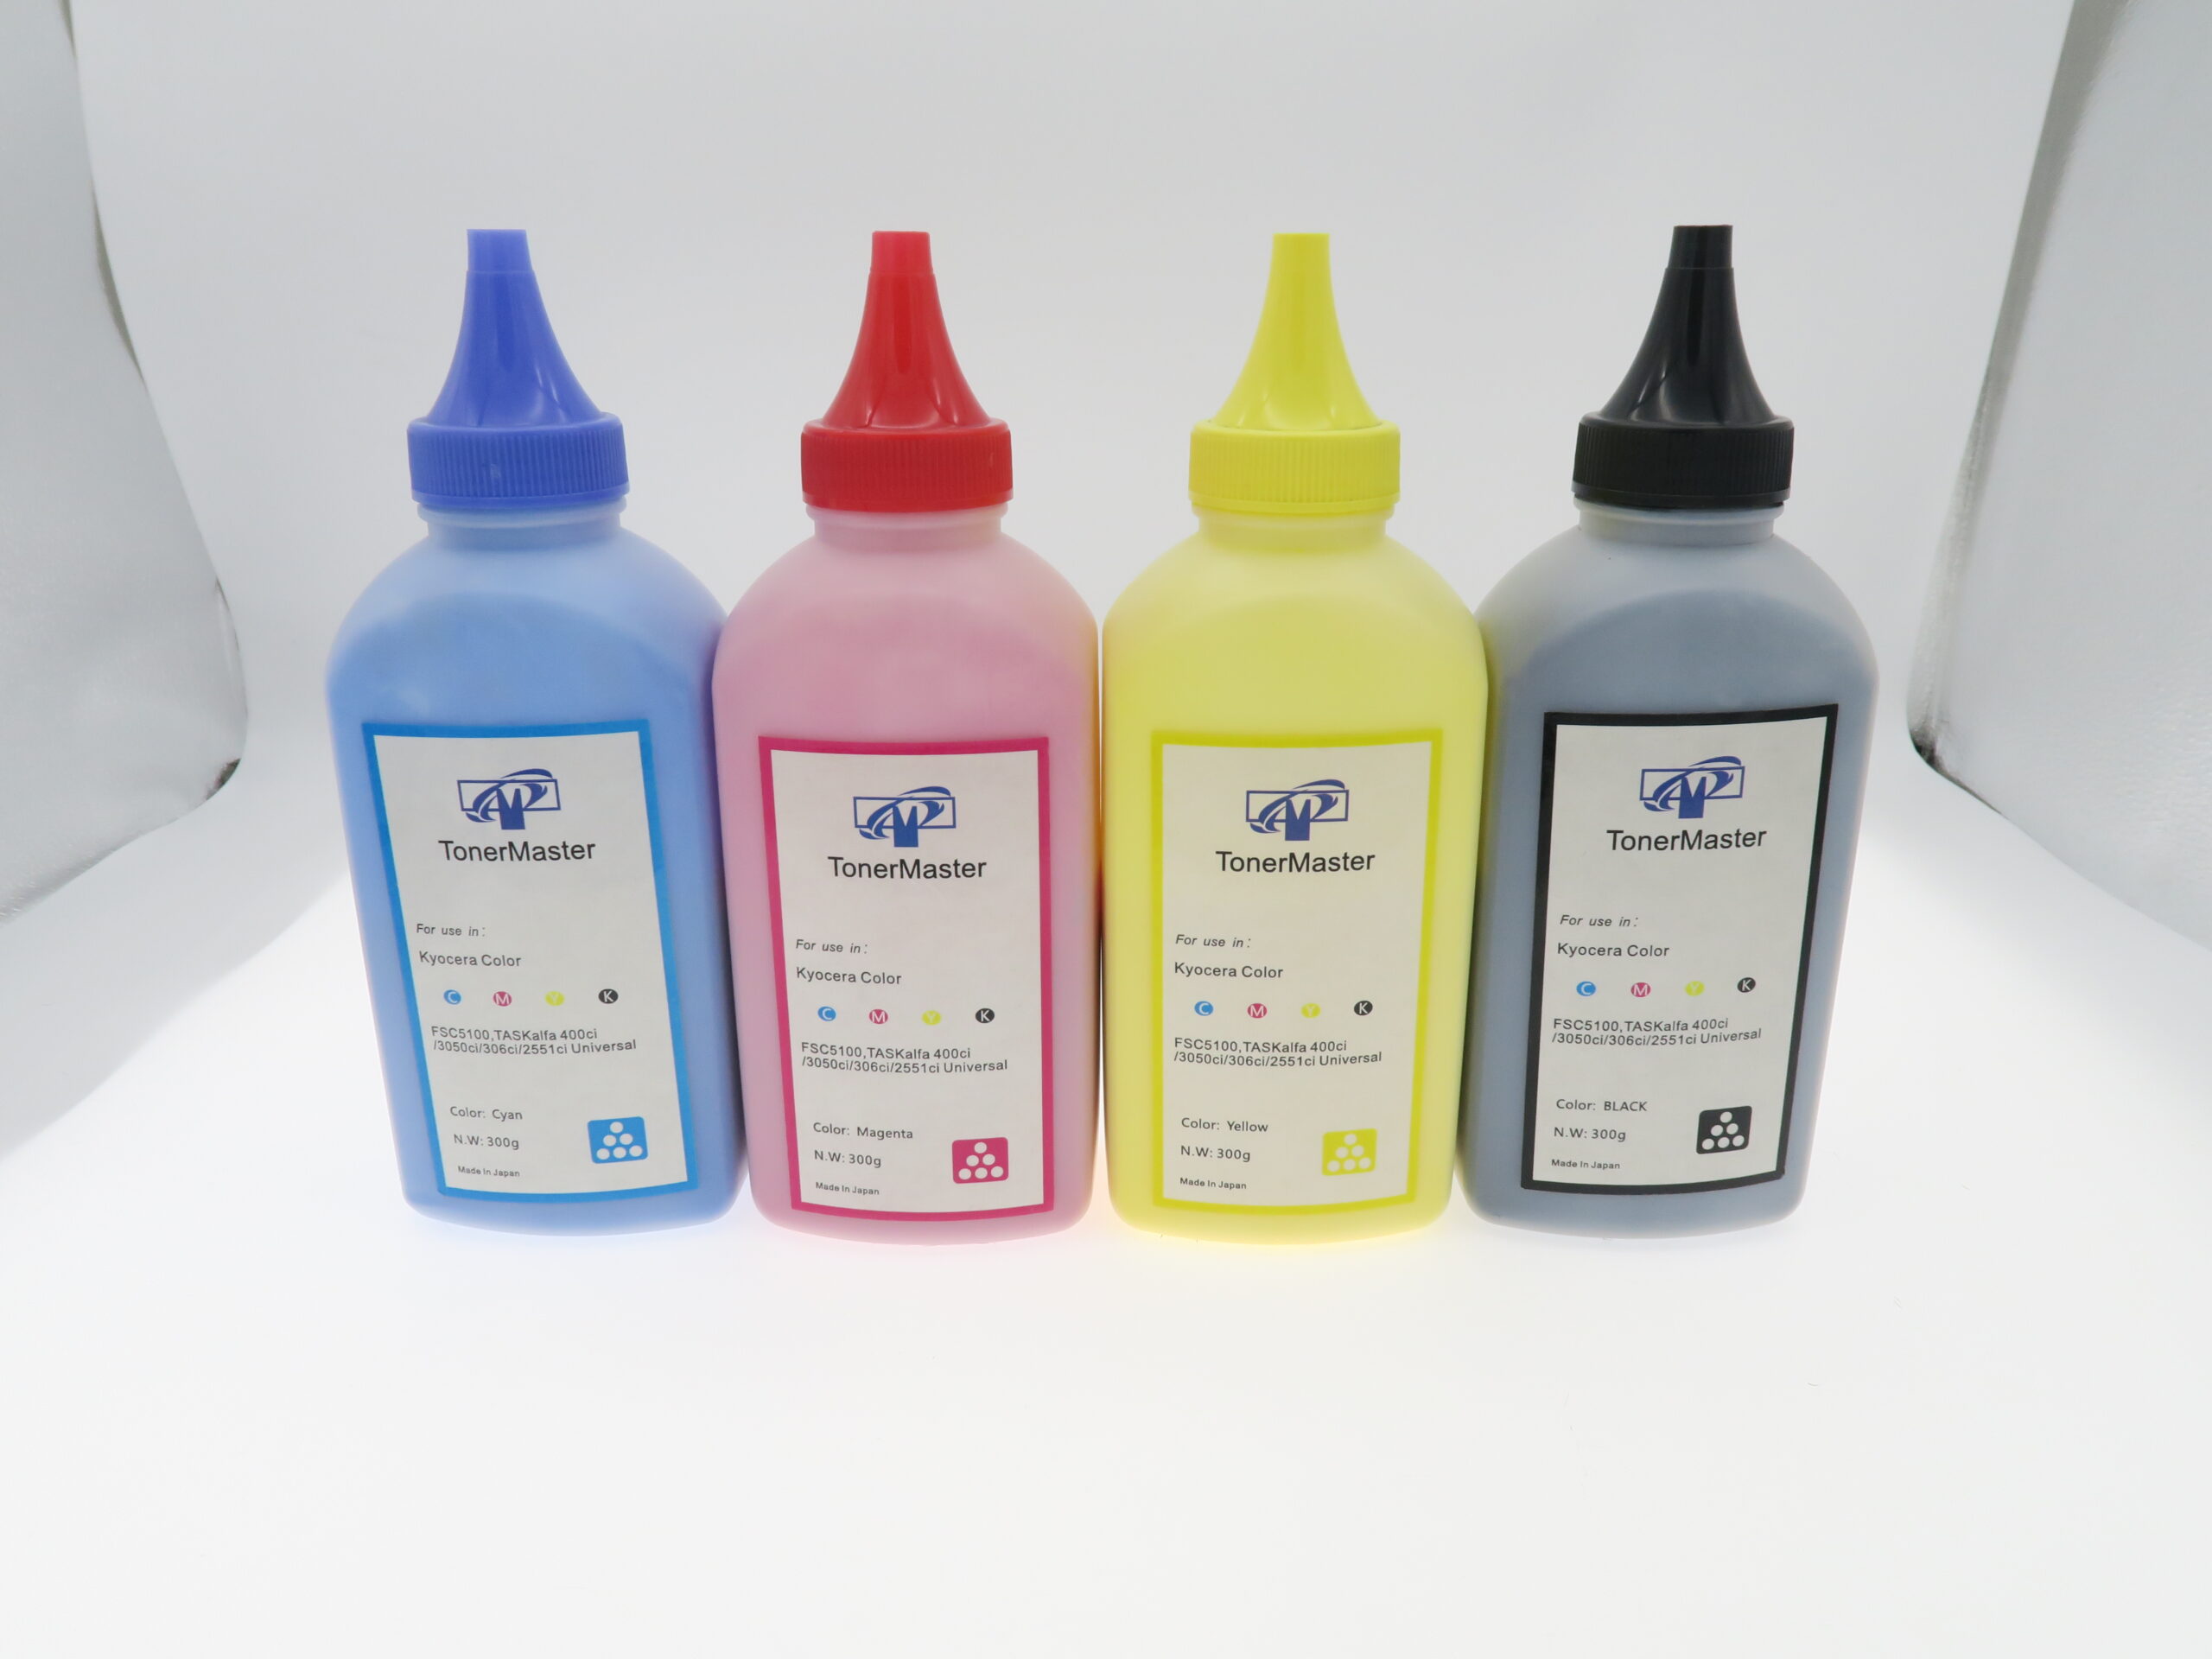
Toner Master Toner Refill Kits & Copier Toner Kit are designed for uncompromised quality and dependability on brands like Brother, EPSON, Kyocera, and other leading printers. Our negligence in automated production lines, specifically, does not help with human error and guarantees a near zero fail rate. We lock production lines for particular printers to guarantee exact performance and precision compatibility. The risks associated with DIY refilling are mitigated thanks to our customization and precision manufacturing which translates to consistent page after page print quality. Relying on Toner Master cartridges guarantees clear and sharp text and images that stand up to everyday printing, along with the demands of professional documents.
In addition, Toner Master provides worry-free printing at a lower cost. Certainly, the goal of DIY refilling is expense reduction. However, compared to original equipment manufacturer (OEM) toner ink cartridges, Toner Master cartridges provide substantial savings while maintaining quality and reliability. You evade the initial purchase of costly equipment, the drill of refill kit expenditure, and the time-consuming task associated with the fill-up process. Think of the time that comes with using a cartridge manufactured professionally that works effortlessly with your printer and serenity. Our reseller program incentivizes wholesalers and other organizations to purchase premium toner cartridges and ensures that affordability is maintained even at bulk buying levels.
Toner Master ensures a flawless printing experience from start to finish. Their product categories are easy to understand and their search systems, whether completed by model of printer or cartridge number, optimize every user’s experience and greatly minimize the time needed to locate products. We understand that every second counts and they have geared their support to be as effortless as possible (i.e. “Can’t Find Toner Kit?” support). This dominantly strengthens your experience by eliminating possible frustrations encountered when looking up toner. Their wide compatibility range across leading brands and series means that users can find a Toner Master cartridge for practically any printer. By ordering cartridges into groups, we have streamlined your search, allowing you to concentrate on what matters most – print jobs. Their focus on one-stop for every service means customers can effortlessly procure toner cartridges within minutes.
Conclusion: Making the Right Choice for Your Printing Needs
As cost-saving and eco-friendly, do-it-yourself toner refilling can be a fun challenge for some. Thinking from a techie’s perspective under the margins of low-volume printing, tolerance for mess, and willingness to get burnt, it is possible. All these factors with lack of time, inconsistent results, and intrinsic risk in mind, create a whole new picture.
Returning back to basics, people who cater to ‘print on demand’ services for clients who prioritize steadfast reliability, ease of use, and consistent print quality benefit greatly from the service Toner Master offers. When it comes to crafting model-specific toner cartridges, Economical, proprietary automation, and laser-precise quality control fall into place. Making the smarter choice means opting out of the risks that DIY refilling entails and investing in minimized downtime with precision print output which, is now possible with Toner Master.
In the end, the rational selection of any option is based on your personal situation, requirements, and priorities. We suggest evaluating value beyond just the initial expenses and considering long-term expenses, durability, tranquility, and overall worth. As we cannot control whether you decide to take a DIY approach or trust the unwavering quality of Toner Master, we trust this guide has equipped you with ample information to make educated decisions regarding these products and improve your printing experience.